Running Jekyll on Hatchbox (updated)
Update July 22 2024: see the end for another setting to change
The hatchbox article referenced in an earlier post says to create a custom build script which will run Jekyll to use git to create the static site (after you push a new version to Hatchbox).
The instructions on the Hatchbox link are somewhat out of date, for some reason “bundle exec” is now required to avoid a “jekyll not found” error.
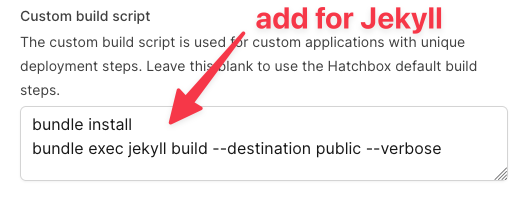
So the Custom Build script is:
bundle install
bundle exec jekyll build --destination public
See below where to add the Custom Build script. (Add –verbose to the end as shown below if you’d like Hatchbox to keep detailed logs you can view if debugging is needed.)
You probably need to disable caching, too
Hatchbox’s default configuration for static websites (like Jekyll) is wholly UN-suitable in one respect: by default it will cache anything in the assets folder for a YEAR. And that’s where the Jekyll stylesheet is. So for example if you change the background color on your blog it will look right in development, but when pushed to Hatchbox you’ll see the same old stylesheet - for a YEAR. The culprit is something called caddy, which handles all sorts of behind-the-scenes magic (with horrid documentation).
Unless/until Hatchbox publishes instructions hwo to ADJUST the cache from a YEAR to something sane, you have a couple of options:
- rename your style.scss file each time you update a style (like “style-240722.scss”), or
- entirely disable hatchbox caching for the site
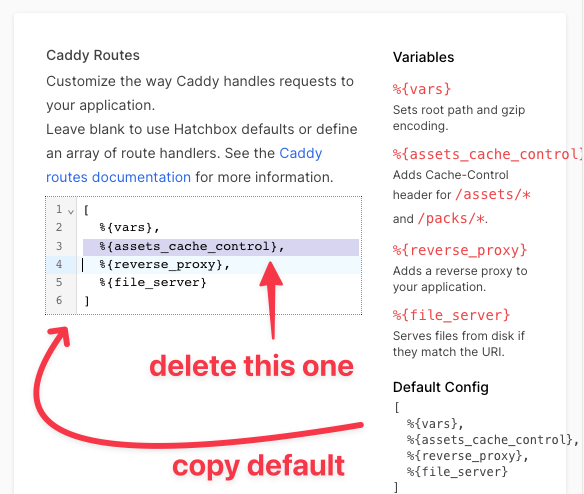
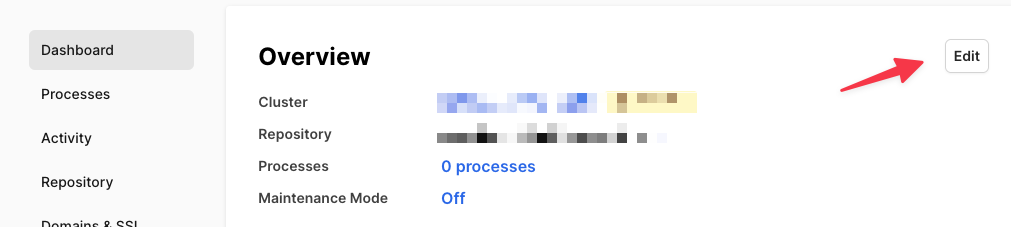
To disable the cache, you need to view the dashboard, click edit, then copy then edit the default caddy routes setting (last figure below)
To get to the Custom Deployments settings:
To add the Custom Build script, scroll down a bit:
To disable caching, scroll down farther: